Why I had to setup Github Actions?
I have been working on few projects simultaneously. When I had to deploy these projects manually it became frustrating.
Deploying the projects manually is a time consuming process that includes copying the files from local machine to the server and starting the project.
It turned out to increase my frustration when multiple small changes occured in a short period of time.
CI/CD the Saviour
I researched about the issue and found that this process of deployment can be automated entirely. The tool that automates this process is known as CI/CD Pipeline.
Performance Impact Comparison
- Manual Deployment took approximately around 3 minutes to manually copy the folders from local to the deployment server and perform specific project steps to start the project.
- Automated deployment took approximately 25-30 seconds to execute the entire process after once I pushed the code to Github or triggered the workflow manually.
- This is approximately 80% – 85% gain in terms of time saving and increased my efficiency as it resulted in less frustration.
Github Actions Setup
Prerequisites
- Github Repository
- Use either a dedicated server from a provider or an AWS EC2 instance. New AWS users can take advantage of the AWS Free Tier by creating a Free Tier–eligible account.
To setup Github Actions I had to do the followings:
- Create a YAML Configuration file
- Setup the server as a Runner
YAML Configuration File
- YAML is a human friendly language that means we can understand it easily.
- It is used commonly for configuration files and works primarily on the principle of indentation. (the spaces/gap at the beginning of the line)
- The YAML file includes all the steps to execute on the RUNNER and is known as the workflow file.
- This file must be saved in the .github/workflows folder in the project root. The workflow file is to be saved in the same folder because Github automation engine is hardcoded to look exactly in this folder.
- The YAML file name can be anything but must be suitable and must be saved with the .yml extension.
Github Runners
- A server/machine where the code is checked out and the project is started.
- A server may have an operating system like Windows, Linux,etc., operating system installed.
- The types of Runners are:
- Github-Hosted Runners: Machines managed and provided by Github, containing pre-installed common development tools
- Self-Hosted Runners: Machines managed by ourselves
- I have worked using Self-Hosted Runners from AWS EC2 and Linux (Ubuntu installed).
YAML Workflow File
name: [PROJECT_NAME]

on:
    push:
        branches: ["main"]
    workflow_dispatch:

jobs:
    deploy:
        runs-on: self-hosted
        steps:
            - name: Create .env file
              run: echo "${{ secrets.PRODUCTION_ENV }}" > .env

            - name: Checkout the code
              uses: actions/checkout@v4
              with:
                  clean: false
                  fetch-depth: 0

            - name: Install Node Modules
              run: npm ci

            - name: Start or Re-Start PM2 process
              run: |
                  pm2 stop [PM2_PROCESS_NAME] >> /dev/null 2>&1 || true
pm2 start server.js --name [PM2_PROCESS_NAME] --time- Replace [PROJECT_NAME] and [PM2_PROCESS_NAME] with suitable names.
- The name field is used by GitHub to display the name of the workflow on the repository’s actions page. If omitted Github uses the workflow filename as the value for the name field.
- The on field specifies when to run/trigger the workflow. It can be either on any Github event or triggered manually.
- The workflow_dispatch is responsible to enable manual trigger of workflow.
- A workflow consists of one or more jobs that is executed either parallely or sequentially. By default the jobs run parallely.
- Each job contains a set of tasks called steps.
- Each step has a name and run field.
- The name of the step to display on the repository’s actions page. If omitted the value of run field is used to display the name of the step.
- The run field runs command-line commands in the OS’s shell. To have multi-line commands we use | (pipe key).
- deploy is the name of job that will be visible in the repository’s actions page.
- The `actions/checkout@v4` is an official package provided by Github to checkout the code on the runner.
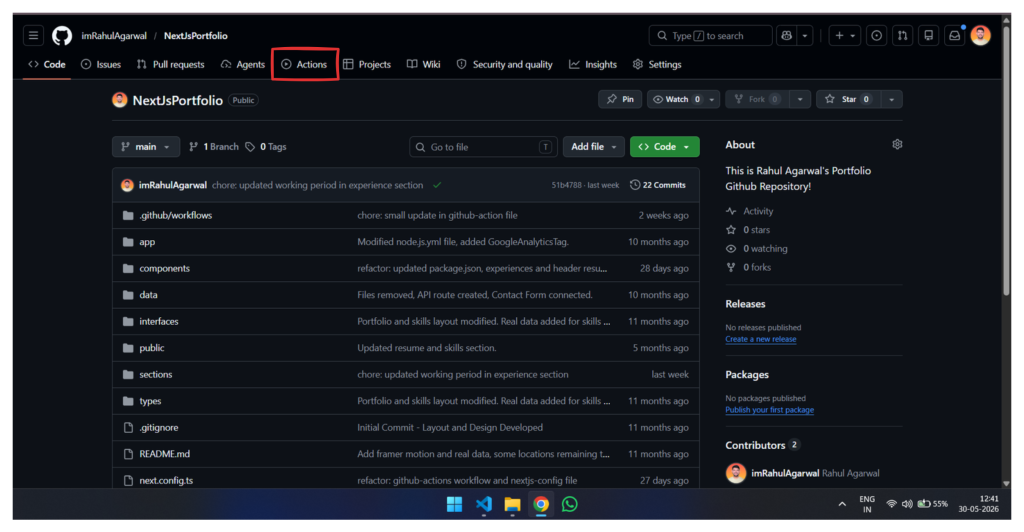
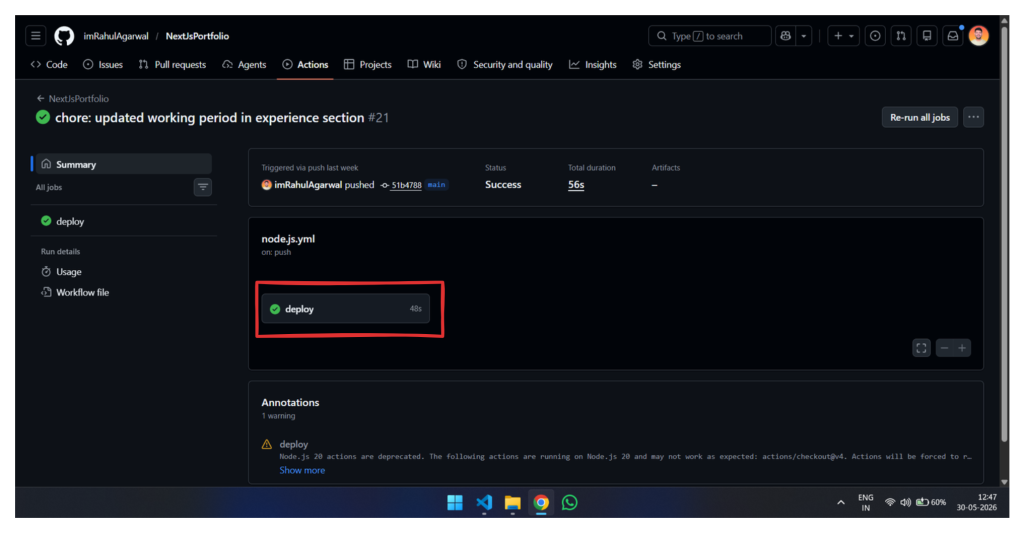
- The actions tab in the repository’s page.
- In this tab we can see all the workflows created, executed and it’s status.
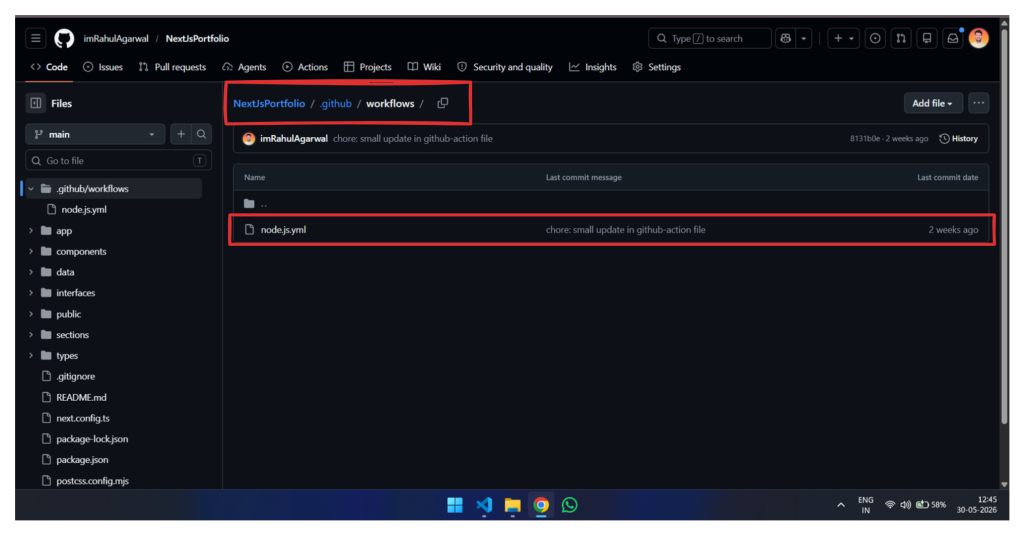
- NextJsPortfolio/.github/workflows is the folder path where all the workflow files is to be stored.
- node.js.yml is a workflow file.
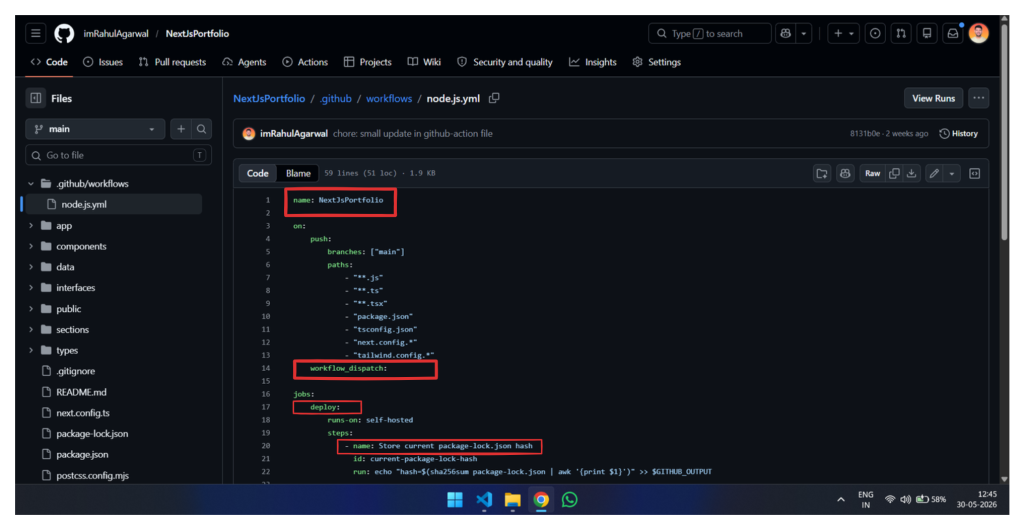
- Name of the worklfow
- worklow_dispatch (manual trigger)
- deploy is the job name.
- Store current package-lock.json hash is the step name.
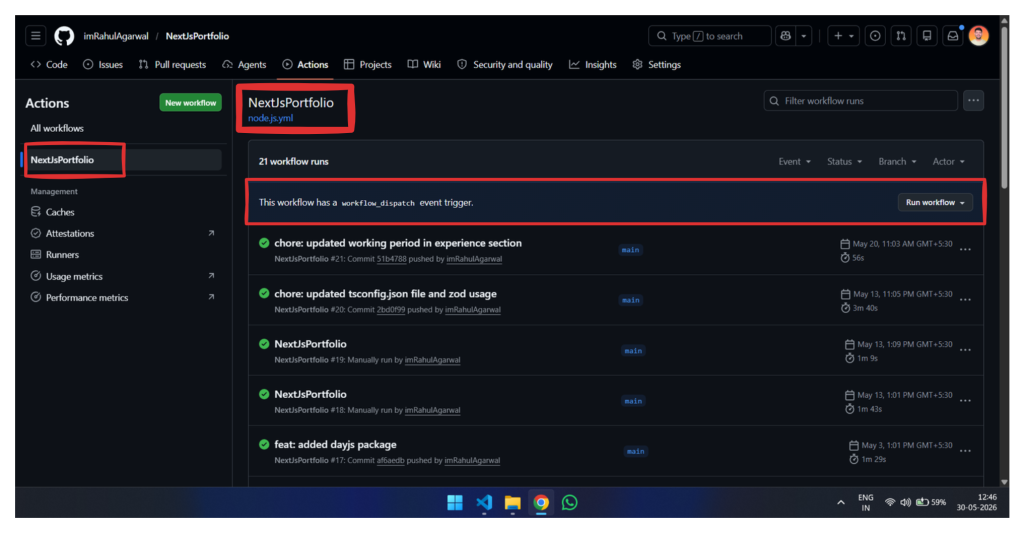
- NextJsPortfolio is the name of the workflow.
- The manual trigger appears in the selected workflow only if workflow_dispatch is setup.
- All the jobs defined in the workflow file will be listed here.
- Currently I had only one job and that was named as deploy.
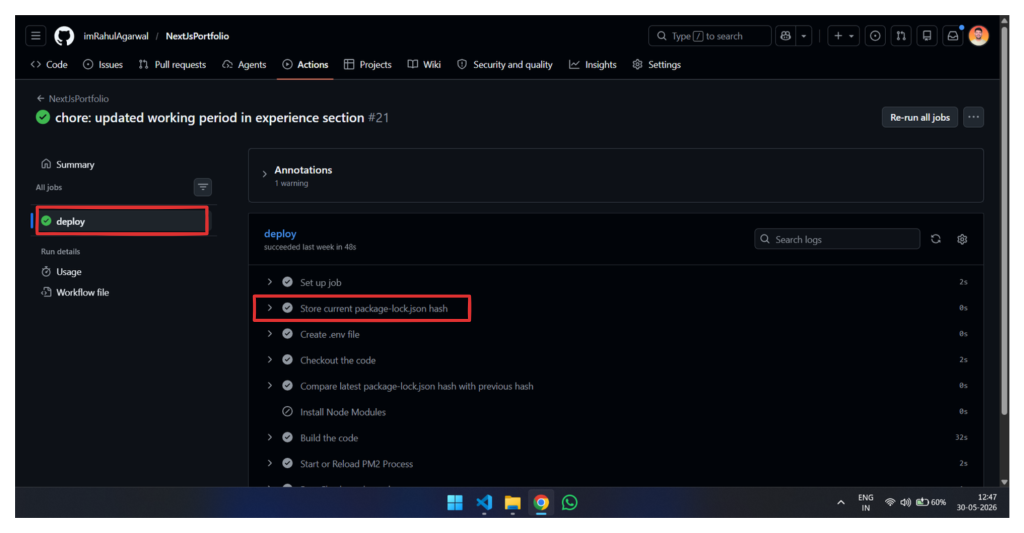
- The job name (deploy)
- The step name (Store current package-lock.json hash)
Self-Hosted Runner Setup
- Open the Settings tab of your repository.
- In the left sidebar, under Code and Automation, expand Actions and select Runners.
- On the Runners page, click New self-hosted runner.
- Follow the setup instructions displayed on the page to configure and register your self-hosted runner.
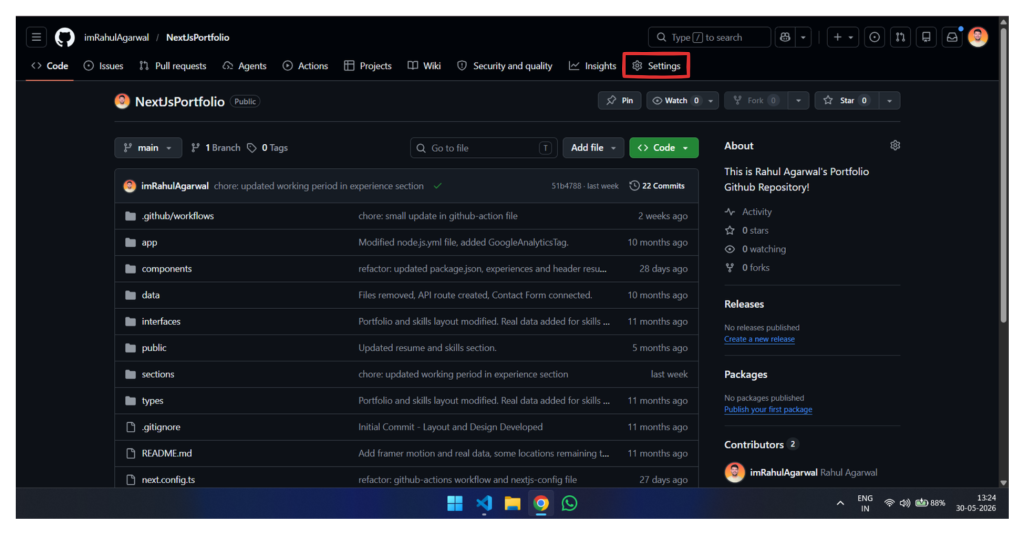
- The settings tab in the repository’s page.
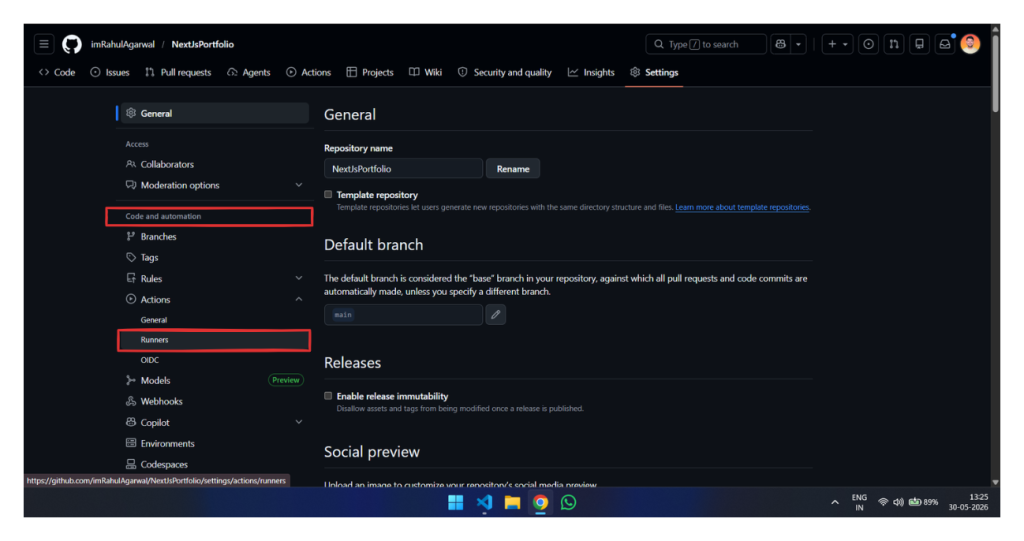
- Runners option under Actions to manage Self-Hosted Runners.
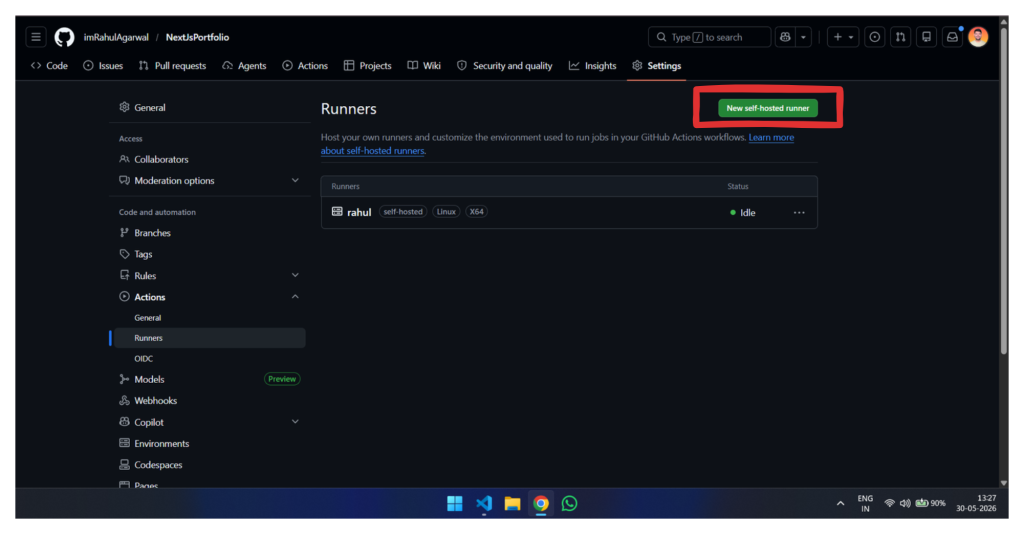
- To create new self-hosted runner
Error I had faced during Github Runner Setup
- When setting up the self-hosted runner, I got an error of Must not run with sudo
- I was logged in as the root user in the ubuntu-server for the runner setup.
- The solution I found for this was to run the ./config.sh command with sudo RUNNER_ALLOW_RUNASROOT=true ./config.sh
- This is the Github-Community Discussion for the same issue I faced.
Conclusion
Implementing a CI/CD Pipeline automates the entire process and benefits us by reducing the time spent in manual deployment and removes the frustration when there are minor changes in short period of time.
If you face any issues, let me know in the comments or email me at imagarwal05@gmail.com.